我的 Astro 部落格主題是整合評論系統 waline,但我覺得它的文件不夠清晰、整合較為複雜,且缺少我想要的驗證源。經過幾番考察後,我選擇使用 Remark42 作為新的評論系統。
Remark42 是一個開源的、可自行託管的評論系統,專為現代網路平台設計。它是一個輕量級、簡單但功能強大的評論引擎,不會監視使用者。它可以嵌入到部落格、文章或任何其他讀者新增評論的地方。他可以簡單的使用 Docker 進行安裝配置,跟我最近開始用的 zeabur PaaS 非常相配。
這次我們來點不一樣的: 透過 Zeabur Template (模板) 來部署服務。
登入 Zeabur CLI
登入 Zeabur cli 有兩種方法:
- 使用交互介面,打開瀏覽器驗證(預設)。
- 使用 Token 驗證。
我選擇第二種方式。
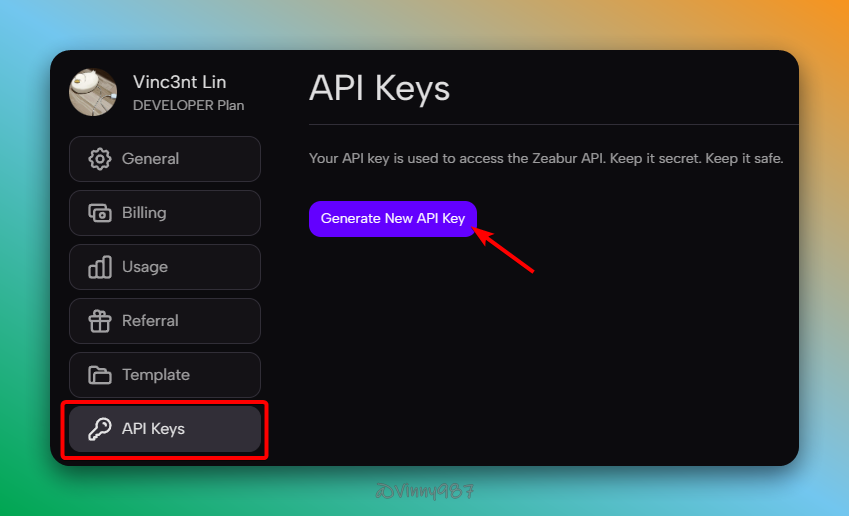
申請 Zeabur API Key
登入 Zeabur 網站,進入設定頁面 -> API Keys 分頁,創建 API Key。
在 Terminal 輸入以下指令,並使用 API Key 登入:
1npx zeabur auth login --token ****************注意: 需要先安裝 npm 才能使用 npx。
登入成功後,會顯示如下訊息:
1INFO Already logged in as Vinc3nt Lin, if you want to use a different account, please logout first使用 Zeabur CLI 測試部署 Remark42
Zeabur 支援類似 Docker Compose 或 Kubernetes 的 YAML 格式,讓我們能輕鬆部署、建立和管理服務 Template。
設置 Template
可以使用公開 Template Remark42,進行部署。不過,為了熟悉 Template 的設置,我選擇 Fork Template。
以下是 Template 內容:
1apiVersion: zeabur.com/v12kind: Template3metadata:4 name: Remark425spec:6 description: Remark42 is a privacy-focused lightweight commenting engine that can be embedded into blogs, articles or any other place where readers add comments.7 variables:8 - key: WEB_URL9 type: DOMAIN10 name: What is your domain for Remark42?11 description: Used to expose Remark42 to the public web12 - key: SITE13 type: STRING14 name: What is your site name for Remark42?15 description: Used to identify the site32 collapsed lines
16 tags:17 - blog18 - comments19 - privacy20 readme: |21 [Remark42](https://remark42.com) is a privacy-focused lightweight commenting engine that allows you to have a self-hosted, simple yet functional comment system that doesn't spy on users.22 services:23 - name: Remark4224 icon: https://cdn.zeabur.com/prebuilt.svg25 template: PREBUILT_V226 spec:27 source:28 image: umputun/remark42:latest29 ports:30 - id: web31 port: 808032 type: HTTP33 volumes:34 - id: remark42-data35 dir: /srv/var36 env:37 REMARK_URL:38 default: ${ZEABUR_WEB_URL}39 expose: true40 readonly: true41 SECRET:42 default: ${PASSWORD}43 expose: true44 SITE:45 default: ${SITE}46 expose: true47 domainKey: WEB_URL想要了解 Template 參數可以參考 template-in-code
注意:
- 要注意避免將敏感資訊放在 Template 的
env裡,而是設定variables在部署時輸入,因為 Zeabur 沒有提供私人 Template 倉庫,創建的 Template 會對外公開。- 只要不使用
npx zeabur template create指令創建 Template,就不會上傳並公開 Template。
指定本地 Template 部署:
1npx zeabur template deploy -f template.yaml根據交互選單設置相關變數,完成後點擊專案連結查看。
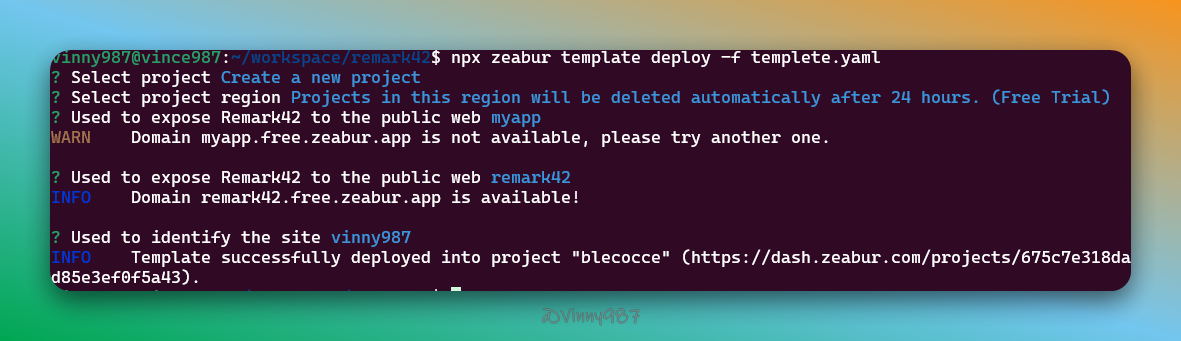
需要約一分鐘,等服務準備完成並開通流量。
驗證 Remark42 部署
remark42 自帶驗證伺服器(Backend)和元件呈現(Frontend)的方法:
Backend 驗證
訪問 /ping 路徑,伺服器正常運作應回應 pong:
1curl https://remark42.zeabur.app/ping2#3pongFrontend 驗證
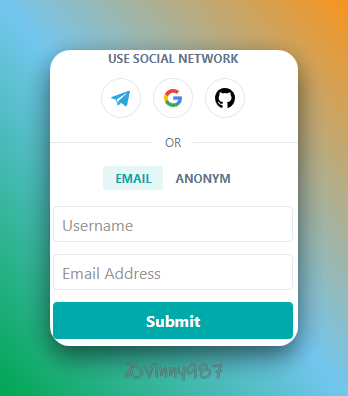
訪問 /web 路徑,檢視前端效果:
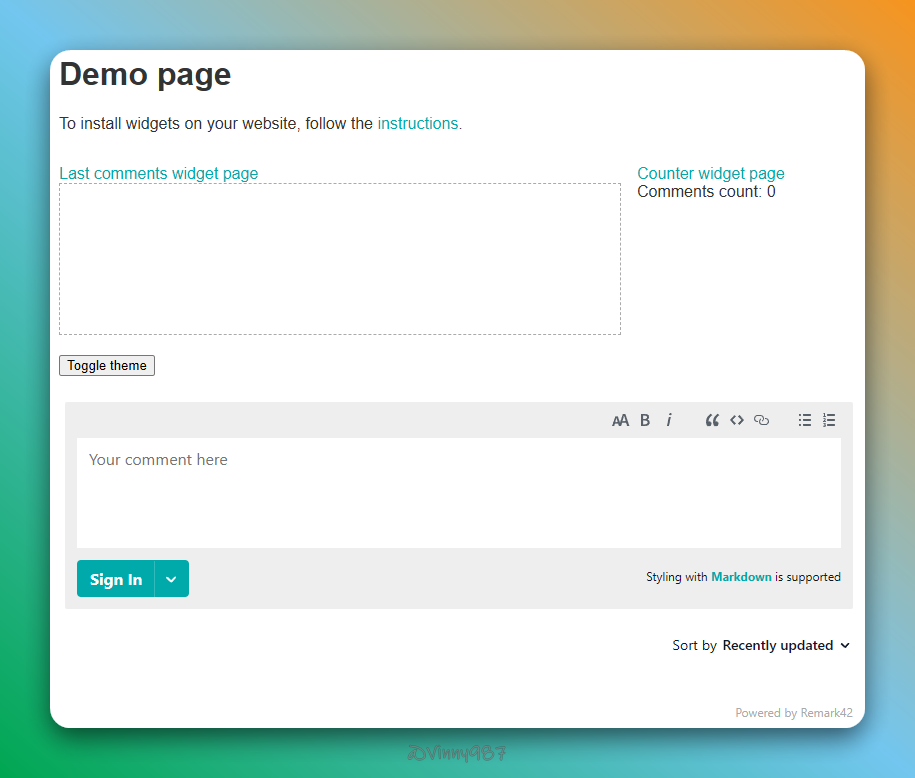
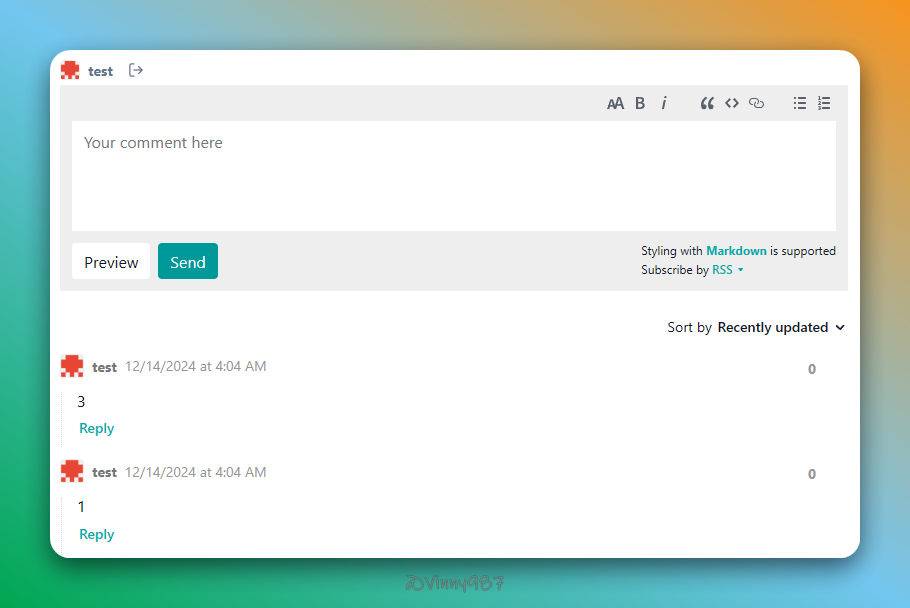
測試新增評論:
Troubleshooting
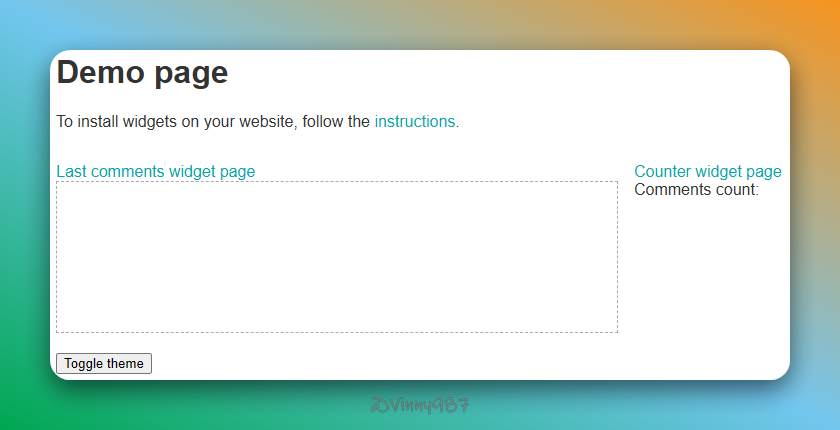
如果使用 zeabur 公開 Template 部署 Remark42,在上面驗證時,可能會看不到評論區塊。
檢查開發者工具,查詢錯誤:
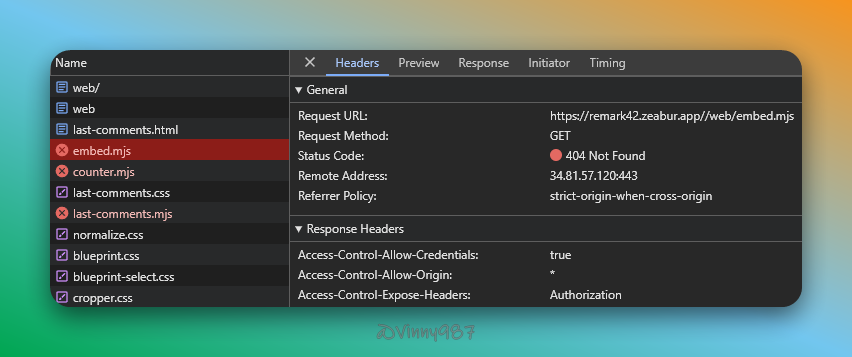
這是因為,該 Template 使用 zeabur 自帶的 ${ZEABUR_WEB_URL} 變數當作 Remark42 參數 REMARK_URL 的值,而 Remark42 的 demo 頁面,並沒有處理好 host 網址最後的 /,因此需要使用 path 庫處理路徑,或是修改 REMARK_URL 的值,重新啟動該服務。
以我的範例為例,${ZEABUR_WEB_URL} 為 https://remark42.zeabur.app/,所以直接修改成REMARK_URL=https://remark42.zeabur.app 即可。
如果想要在 zeabur 綁定自己的域名,而不使用 zeabur 自帶的,可以參考自定義域名
配置
以下內容,只要有為 remark42 新增或修改參數,都需要重啟後端伺服器。
整合驗證服務
remark42 提供不少登入驗證服務,簡單紀錄如何配置我用到的,其他服務參考 Authorization 。
GitHub
-
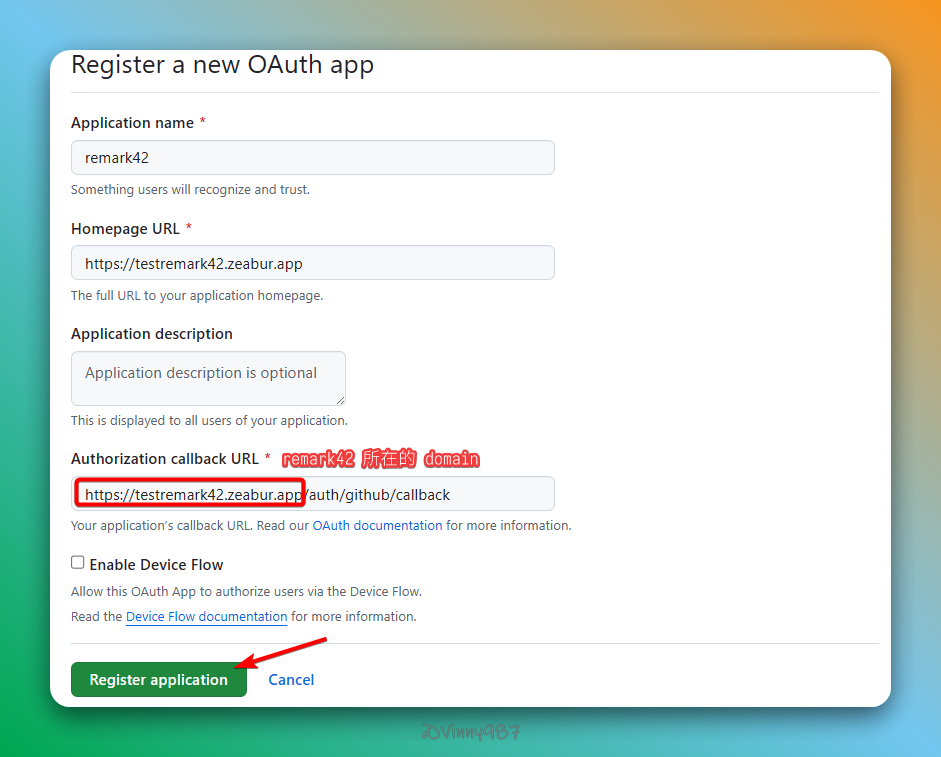
登入 OAuth App,創建新的 OAuth App,依以下資訊填寫後儲存:

-
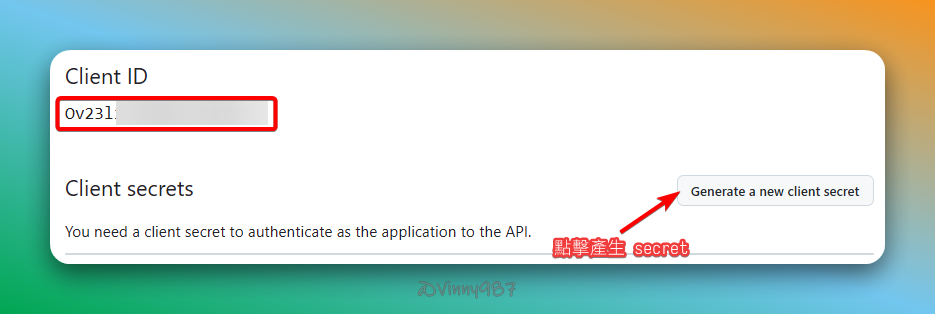
點擊 Generate a new client secret,記下 Client ID 與 Client Secret。
-
添加以下參數到 Remark42 配置中:
Terminal window 1AUTH_GITHUB_CID=<client_id>2AUTH_GITHUB_CSEC=<client_secret> -
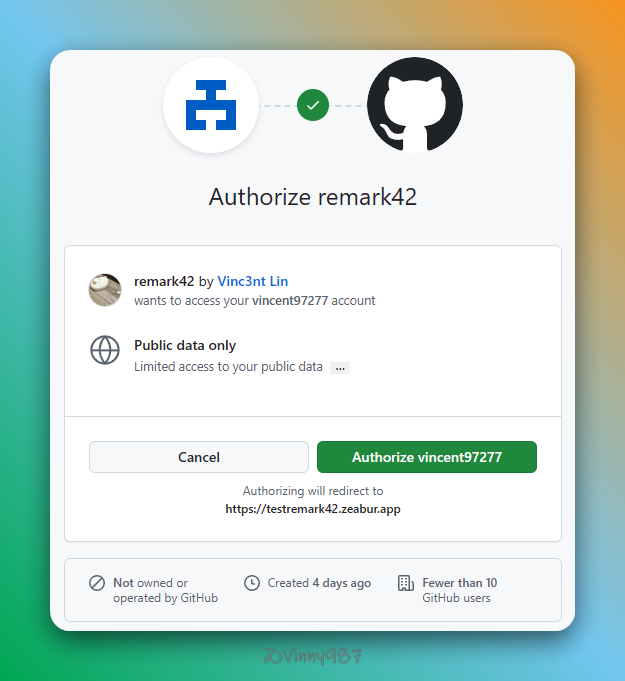
測試 GitHub 驗證登入功能:

-
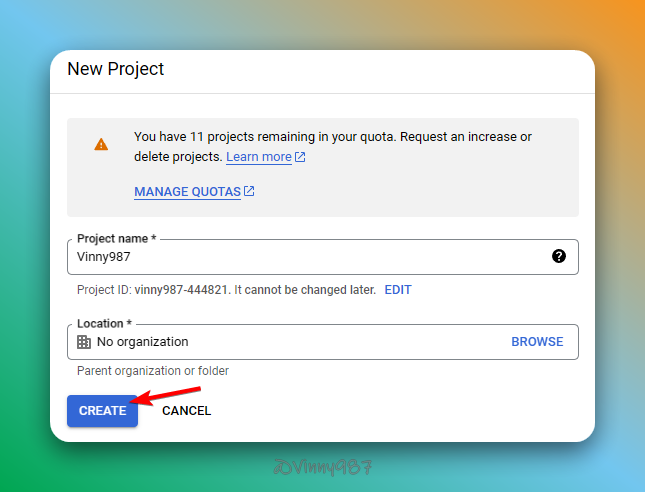
登入 Google Cloud Platform (GCP),選擇或建立新專案:
-
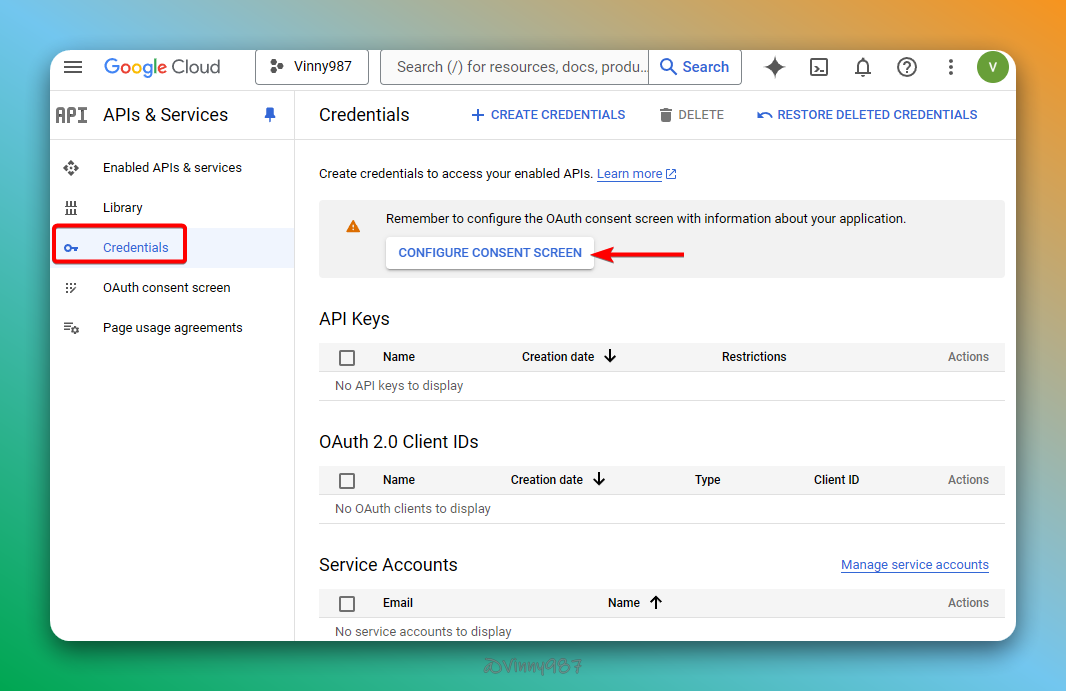
前往
API & Services->Credentials,點擊 CONFIGURE CONSENT SCREEN。 -
設定
User Type為 External,完成以下步驟:
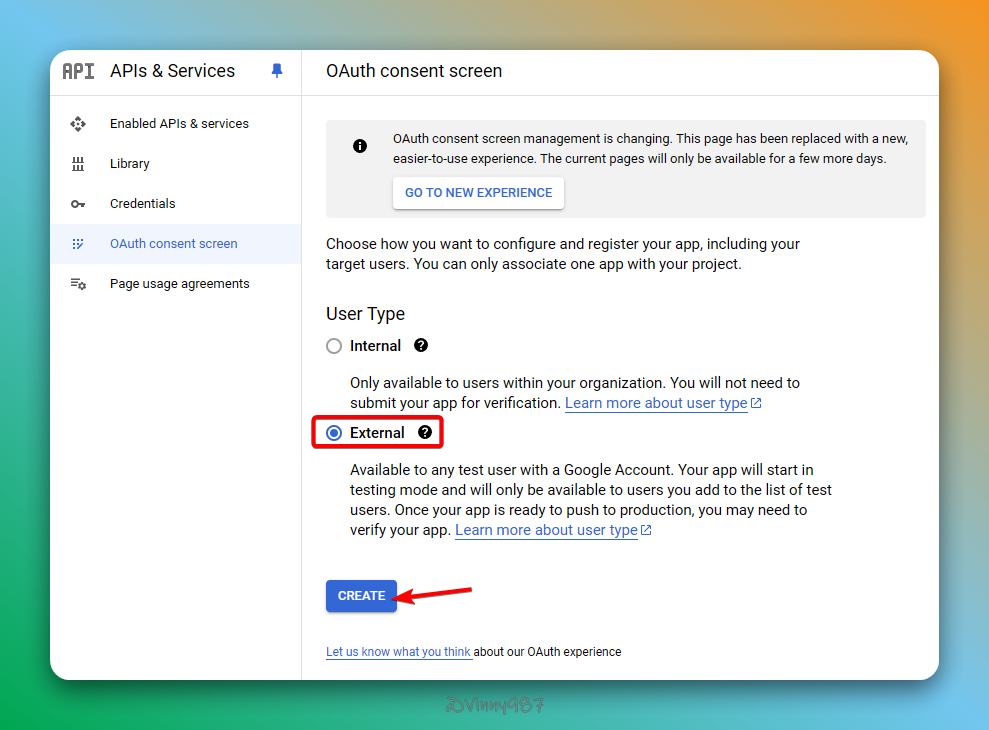
- OAuth consent screen: 填寫基本資訊,點擊 SAVE AND CONTINUE。
- Scopes: 點擊 SAVE AND CONTINUE。
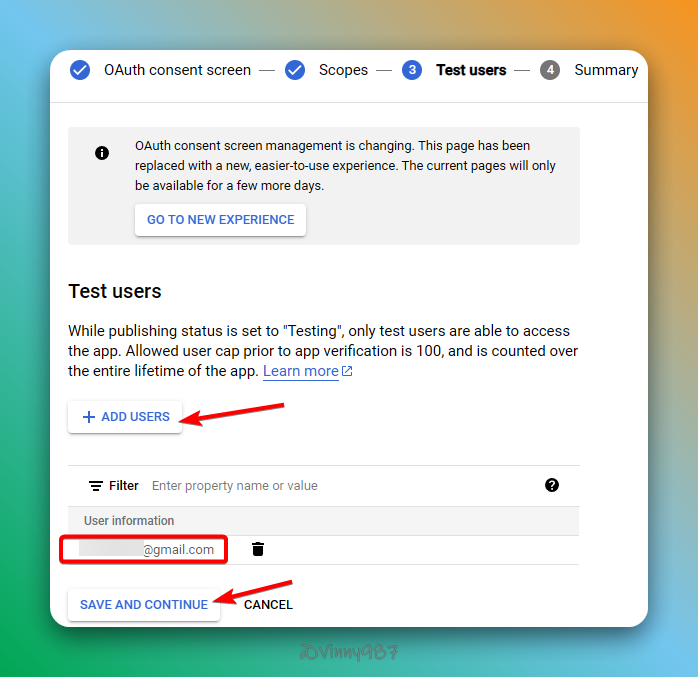
- Test users: 新增測試用戶 email,點擊 SAVE AND CONTINUE。

-
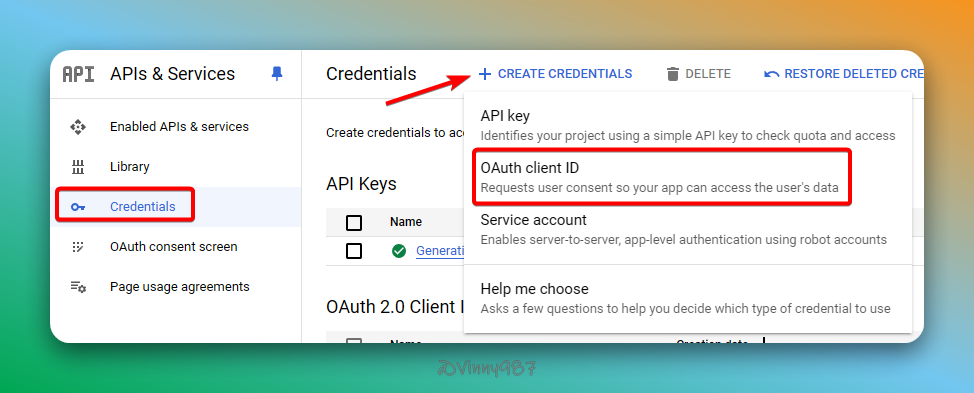
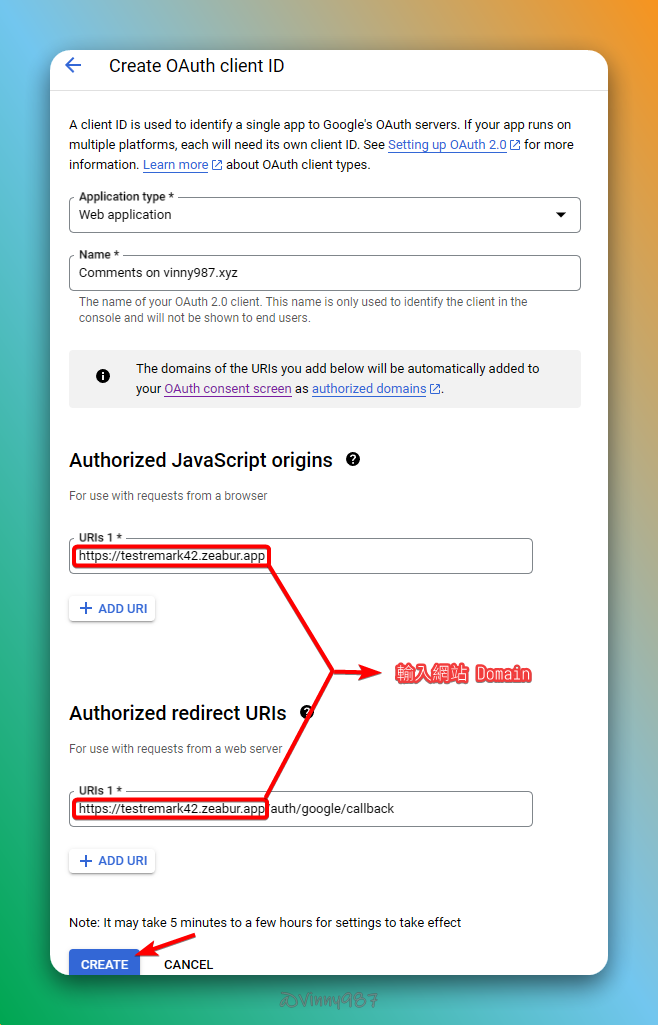
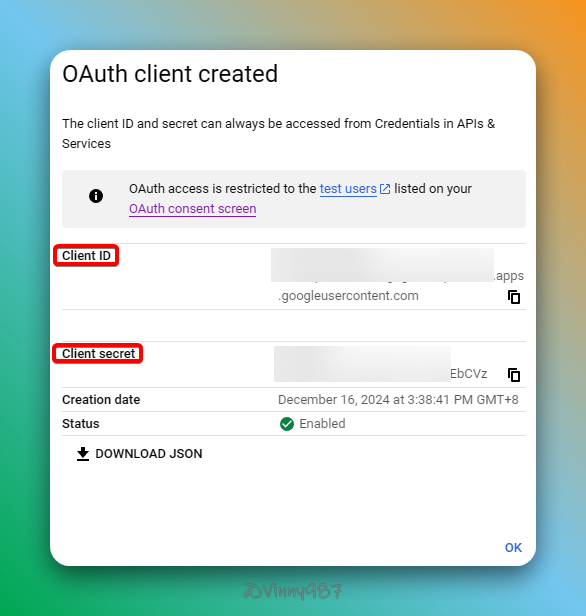
回到
Credentials,創建OAuth client ID,並記下 Client ID 與 Client Secret。 -
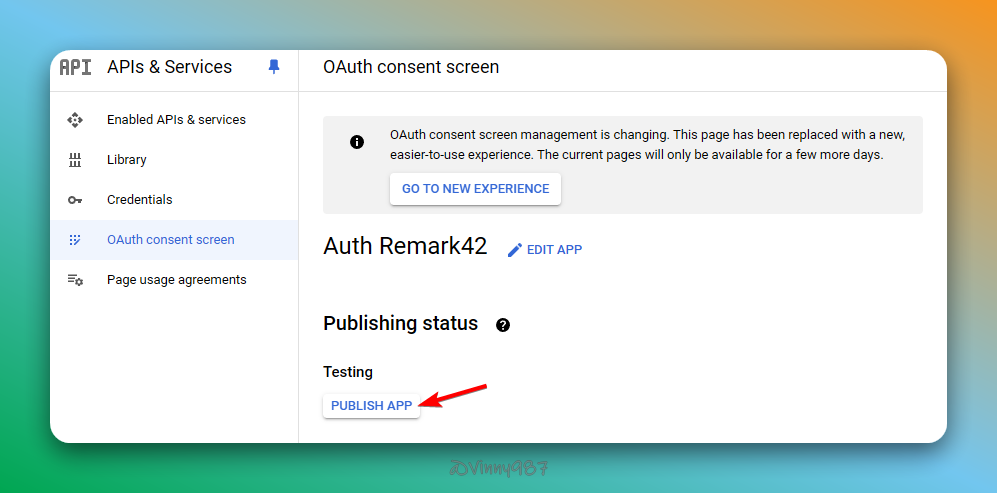
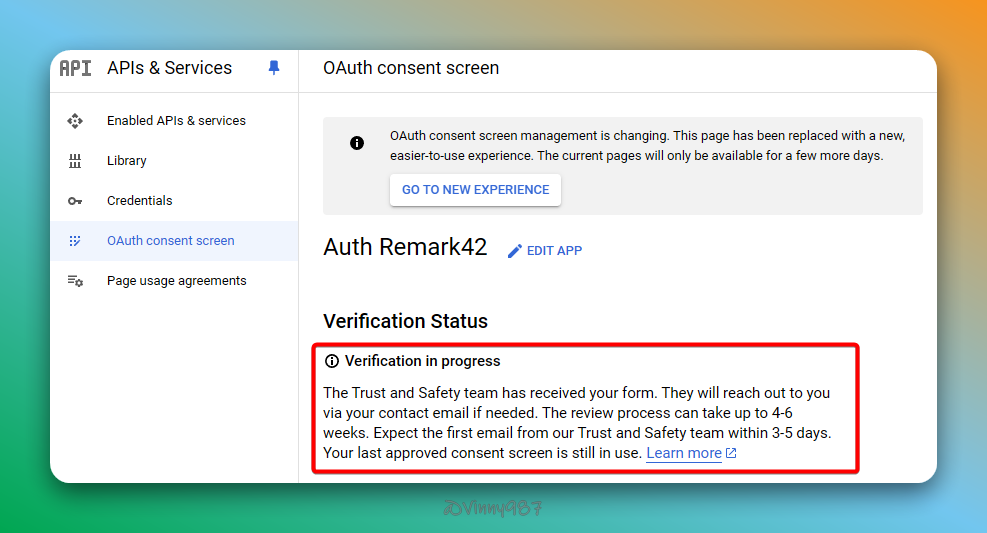
需將服務發布到 Production,回到
OAuth consent screen頁面,按照以下步驟完成設定:接收標題為
[Action Needed] OAuth Verification Request Acknowledgement的 Email,並且回覆即完成驗證。 -
添加以下參數到 Remark42 配置中:
Terminal window 1AUTH_GOOGLE_CID=<client_id>2AUTH_GOOGLE_CSEC=<client_secret> -
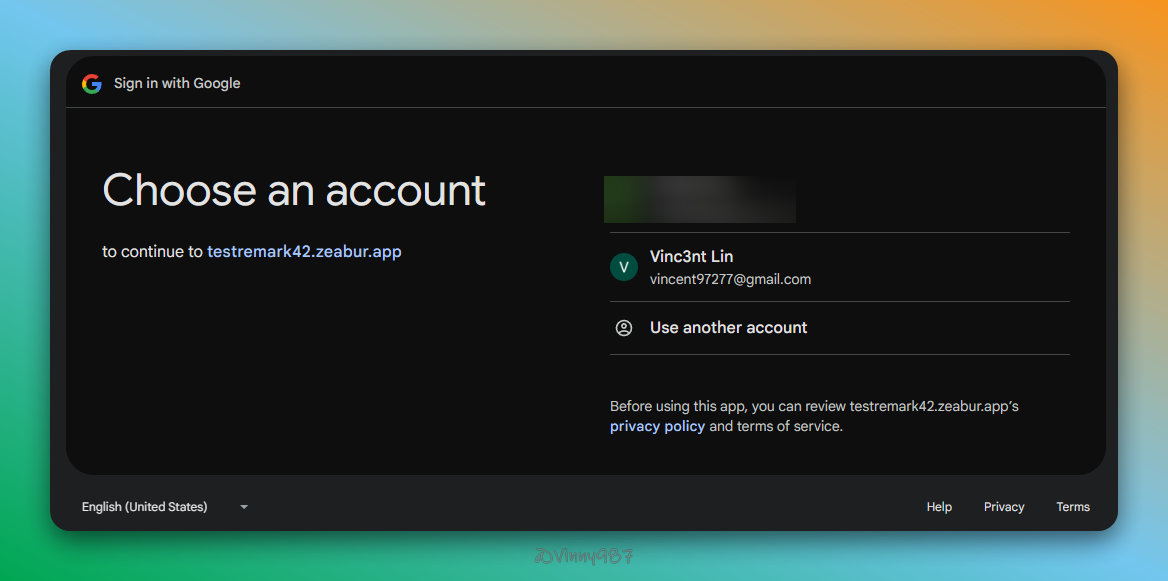
測試 Google 驗證登入功能:
Telegram
-
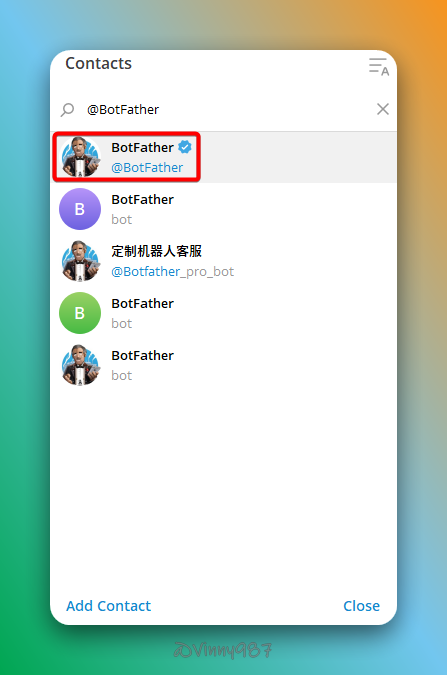
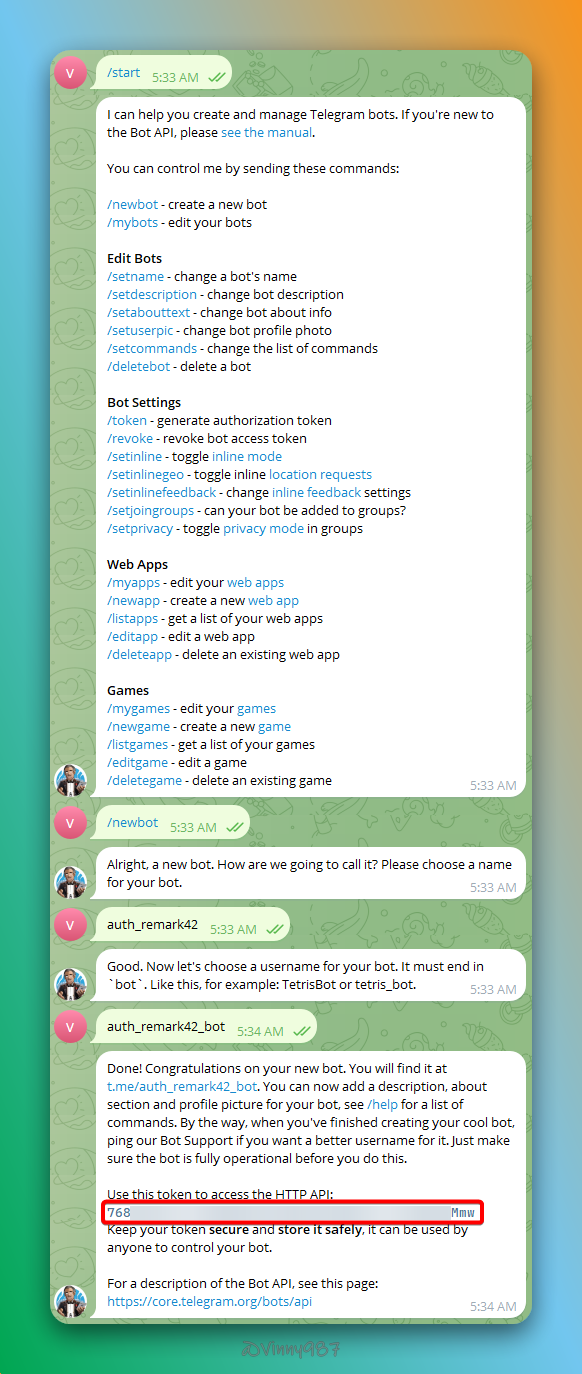
在 Telegram 中搜尋 @BotFather 並啟動對話,按照指示創建新 Bot,記下生成的 Token:
-
添加以下參數到 Remark42 配置中:
Terminal window 1TELEGRAM_TOKEN=<bot_token>2AUTH_TELEGRAM=true -
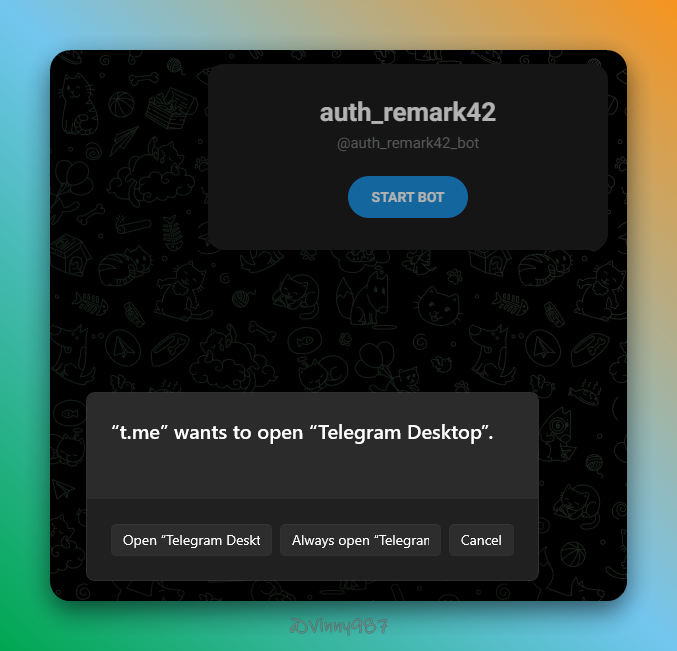
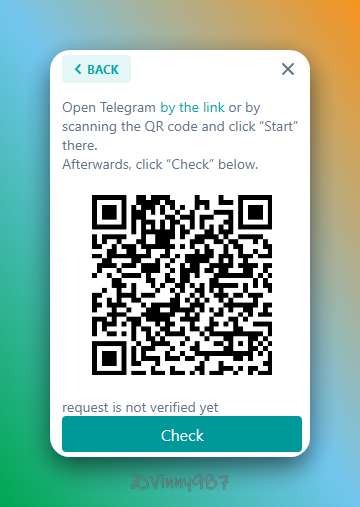
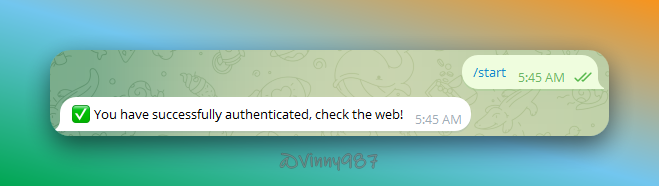
測試 Telegram 驗證登入功能:
使用 Google SMTP 為例
-
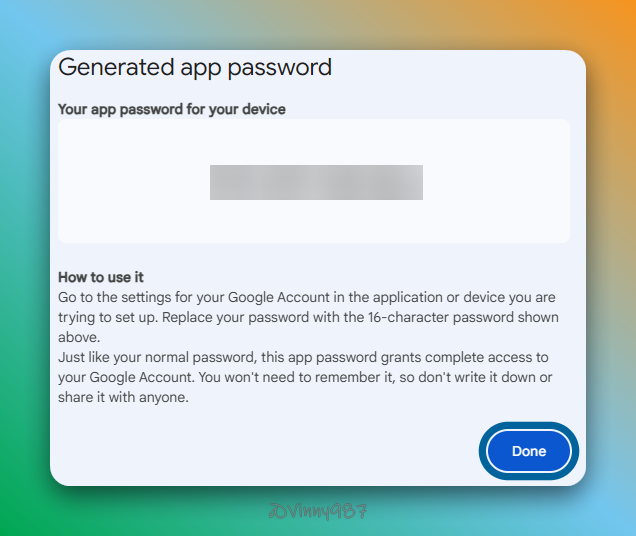
啟用 Google 帳戶的二步驟驗證,並在 App Passwords 中創建 App 密碼:
-
添加以下參數到 Remark42 配置中:
Terminal window 1SMTP_HOST=smtp.gmail.com2SMTP_PORT=4653SMTP_TLS=true4SMTP_USERNAME=<your_email>5SMTP_PASSWORD=<app_password>6AUTH_EMAIL_ENABLE=true -
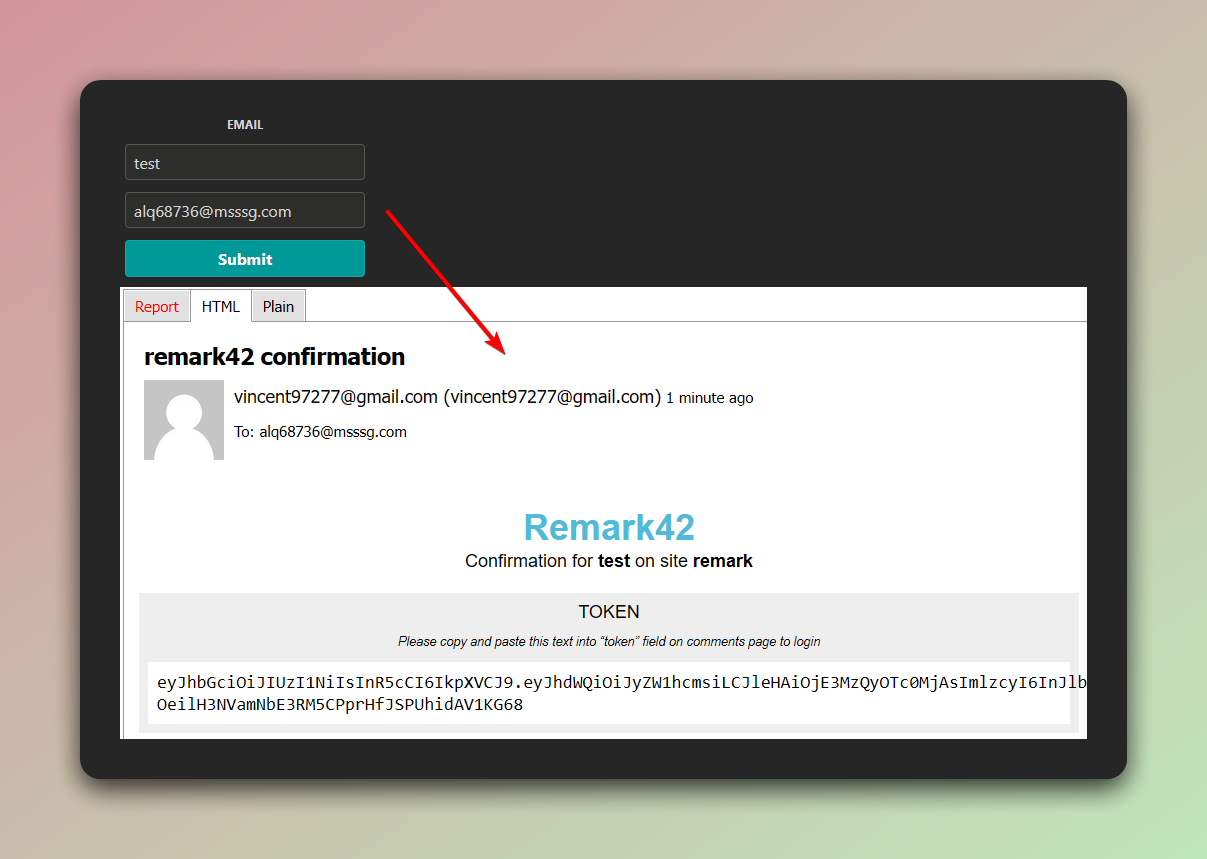
測試 Email 驗證登入功能:
官方文件提到,可以增加通知 email及顯示不同的寄件者,不過我實測沒有作用。
- AUTH_EMAIL_FROM
- NOTIFY_USERS
- NOTIFY_EMAIL_FROM

Anonymous
添加以下參數到 Remark42 配置中即可啟用匿名登入功能:
1AUTH_ANON=true管理通知設置
Remark42 支援 Email 和 Telegram 兩種管理員通知方式。以下介紹如何使用 Telegram 作為通知工具。
配置 Telegram 通知
-
建立 Telegram 頻道:
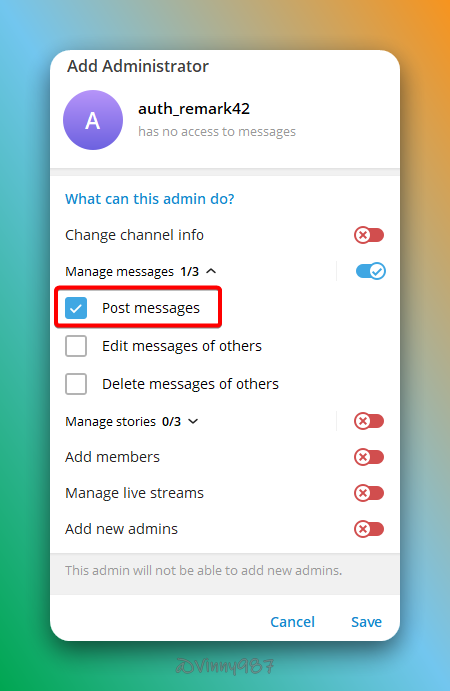
- 在 Telegram 創建一個新頻道(Channel)。
- 將上面已配置的 Telegram Bot 加入頻道並設為管理員,確保其具備發文權限。
-
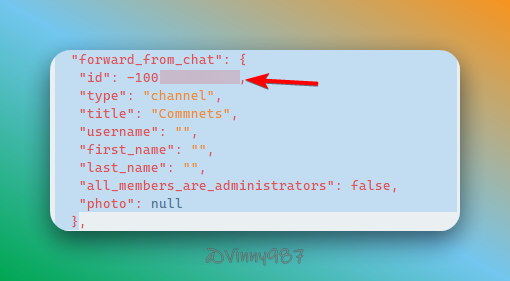
獲取頻道 ID:
- 在頻道內發送任意訊息,將該訊息轉發至
@JsonDumpBot。 - 紀錄轉發訊息中的
forward_from_chat.id,這便是頻道 ID。
- 在頻道內發送任意訊息,將該訊息轉發至
-
在 Remark42 配置中添加以下參數:
Terminal window 1NOTIFY_ADMINS=telegram2NOTIFY_TELEGRAM_CHAN=<your_channel_id> -
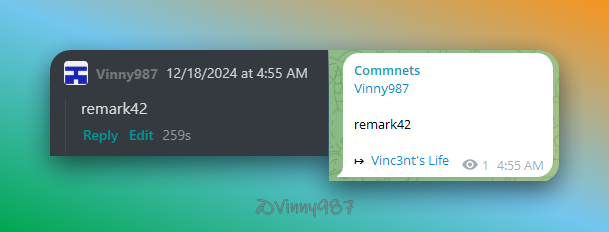
發送測試通知,確認配置是否生效:
限制可用域名與跨域驗證
若 Remark42 與部落格部屬於不同域名,可能遇到Cross domain authorization fails的情況。
根據 separate-domain,可以進行以下操作:
-
允許跨域驗證:添加以下參數以啟用跨域支持:
Terminal window 1AUTH_SAME_SITE=none -
限制可用域名:Remark42 預設所有的域名都可以嵌入該服務,為確保安全性,限制能嵌入評論功能的域名:
Terminal window 1ALLOWED_HOSTS="'self',<your-domain>"注意:若
ALLOWED_HOSTS中包含_,可能導致 DNS 解析問題,詳情請參閱 RFC 1035。規格的 2.3.1. Preferred name syntax 章節。
Remark42 與 Astro 的整合
官方文件很貼心的提供了說明。大致講解我的做法:
創建元件
在 src/components 目錄下新增 Remark42Comment 元件,並基於我使用的主題 Renderer 和需求修改。
1import { onCleanup, onMount } from "solid-js";2import { comment } from "../consts";3import { getPreferTheme } from "../utils/getPreferTheme";4
5declare global {6 interface Window {7 REMARK42: any;8 remark_config: any;9 }10}11
12const insertScript = (id: string, parentElement: HTMLElement) => {13 const script = window.document.createElement("script");14 script.type = "text/javascript";15 script.async = true;59 collapsed lines
16 script.id = id;17
18 let url = window.location.origin + window.location.pathname;19 if (url.endsWith("/")) {20 url = url.slice(0, -1);21 }22
23 script.innerHTML = `24 var remark_config = {25 ...${JSON.stringify(comment.remark42Config)},26 url: "${url}",27 theme: "${getPreferTheme()}",28 };29 !function(e,n){for(var o=0;o<e.length;o++){var r=n.createElement("script"),c=".js",d=n.head||n.body;"noModule"in r?(r.type="module",c=".mjs"):r.async=!0,r.defer=!0,r.src=remark_config.host+"/web/"+e[o]+c,d.appendChild(r)}}(remark_config.components||["embed"],document);`;30
31 parentElement.appendChild(script);32};33
34const removeScript = (id: string, parentElement: HTMLElement) => {35 const script = window.document.getElementById(id);36 if (script) {37 parentElement.removeChild(script);38 }39};40
41const manageScript = () => {42 if (typeof window === "undefined") {43 return () => {};44 }45
46 const { document } = window;47 if (!document.getElementById("comments-script")) {48 insertScript("comments-script", document.body);49 }50
51 return () => removeScript("comments-script", document.body);52};53
54export function Remark42Comment() {55 onMount(() => {56 const cleanup = manageScript();57 onCleanup(cleanup);58 });59
60 return (61 <>62 <div id="remark42"></div>63 </>64 );65}66
67export function Remark42LastComments() {68 onMount(() => {69 const cleanup = manageScript();70 onCleanup(cleanup);71 });72
73 return <div class="remark42__last-comments"></div>;74}我做的修改:
- 添加
Remark42LastComments元件。 - 整合主題切換功能到現有按鈕中。
- 從
comment.remark42Config獲取配置。 - 修改
manageScript邏輯,避免重複注入腳本。
在 Astro 中使用
嵌入評論功能:
1<Remark42Comment client:visible />顯示最新評論:
1<Remark42LastComments client:visible />並在 comment.remark42Config 中添加:
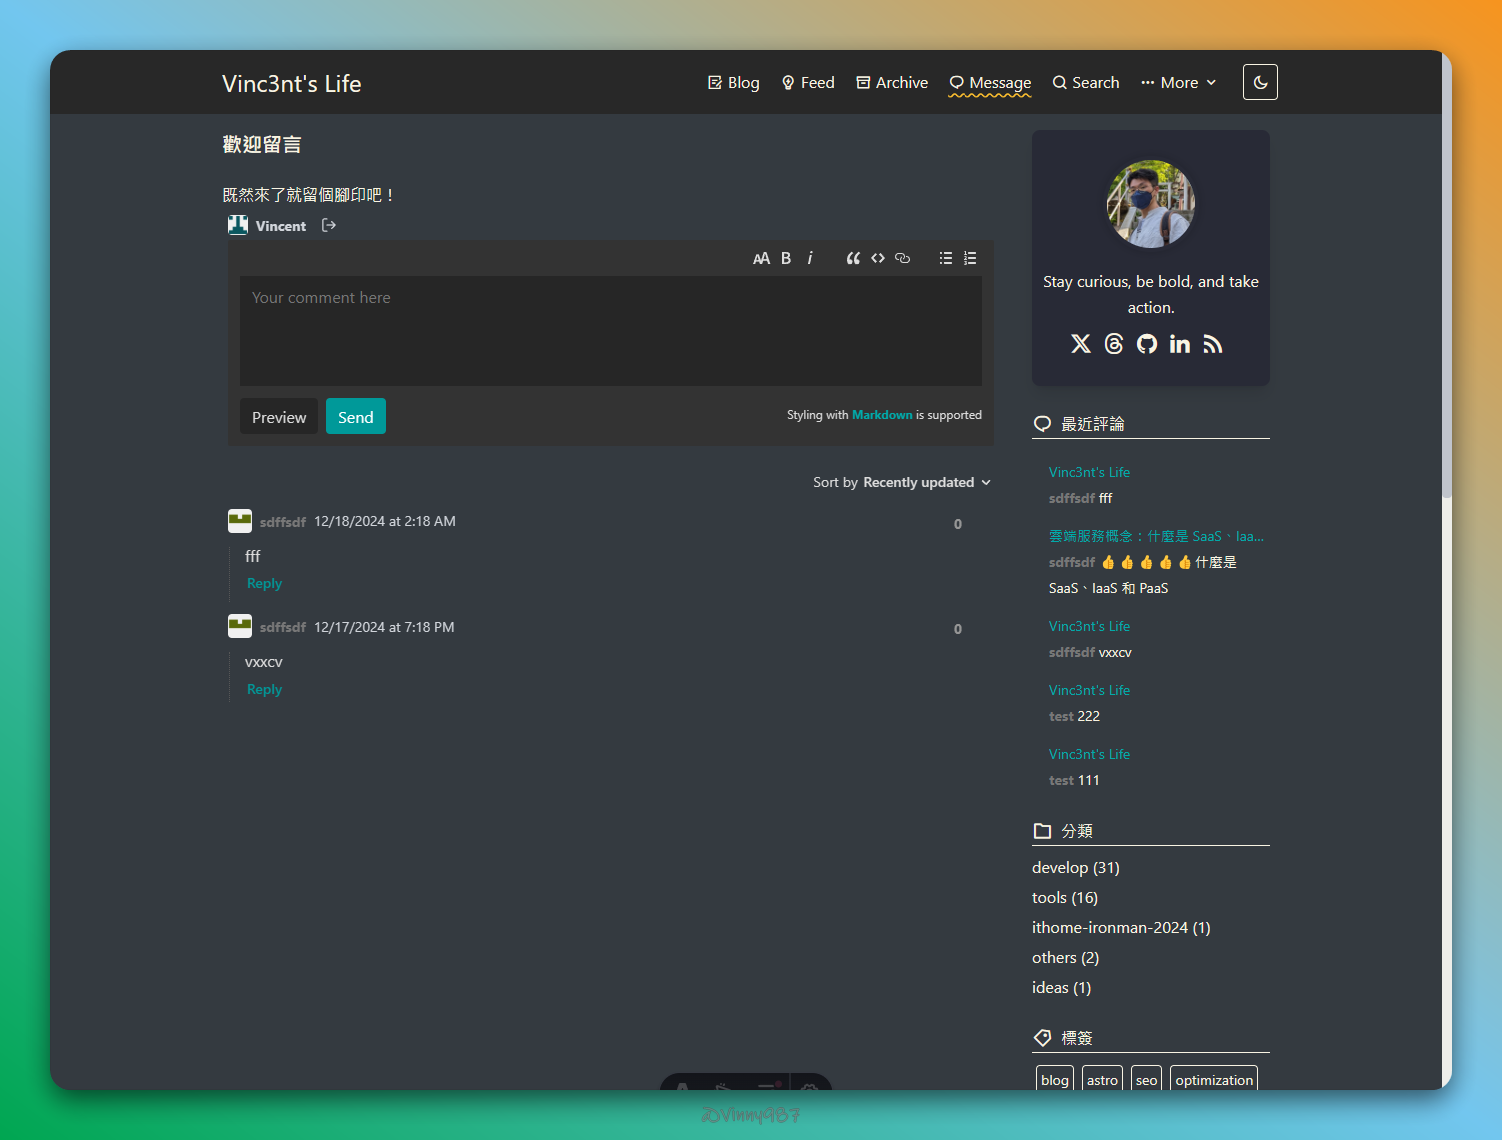
1comment.remark42Config.components = ["last-comments"];最終效果
上架 Template
在 Terminal 使用以下指令,上架 Template:
1npx zeabur template create -f template.yaml2#3INFO Template "Remark42" (https://zeabur.com/templates/5T9243) created如要更新 Template,使用以下指令:
1npx zeabur template update -c 5T9243 -f template.yaml要部署公開 Template,使用以下指令:
1npx zeabur template deploy -f https://zeabur.com/templates/5T9243.yaml延伸
考慮到未來可能會有搬遷服務的需求,研究了一點相關的操作。
備份 & 還原 remark42
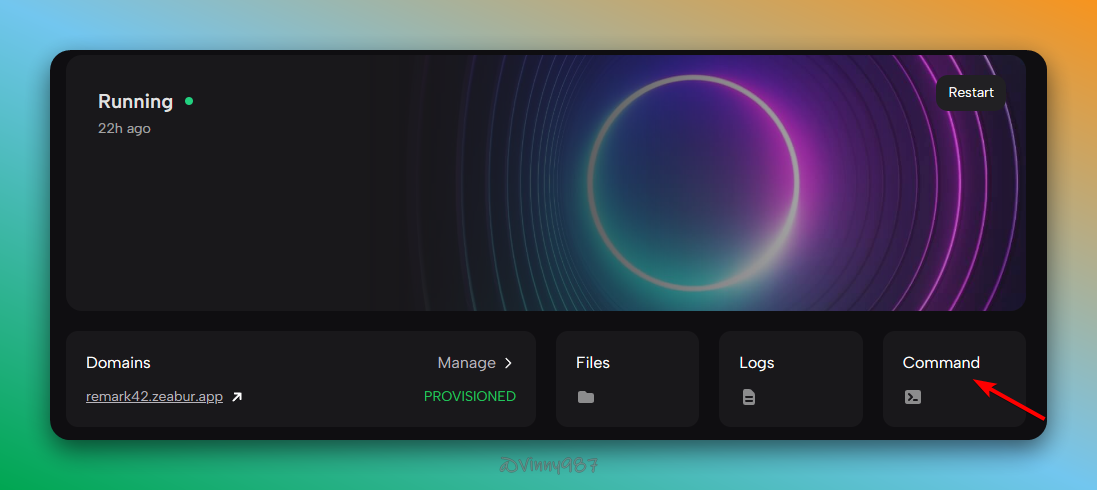
根據 remark42 - backup 說明,remark42 每天都會自動備份到 ./var/backup 路徑,如果想要進行手動備份,需要在 remark42 添加參數 ADMIN_PASSWD=your_passowrd (預設沒有填 - 關閉),再到容器中執行指令 backup -s {your site ID},就會產生備份檔 userbackup-{site ID}-{timestamp}.gz 到備份路徑下。
在 Zeabur 操作如下:
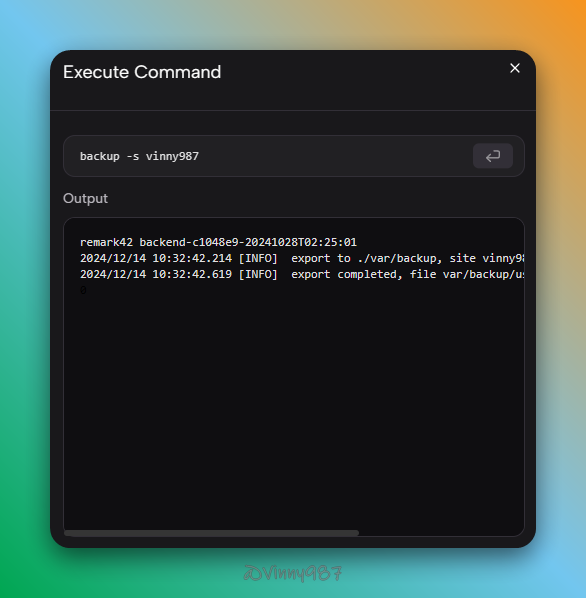
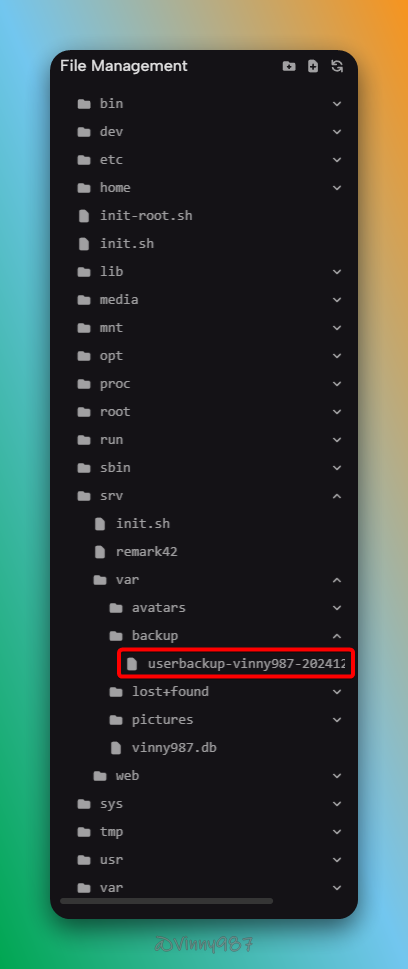
備份內容類似如下:
1{"version":1,"users":[],"posts":[]}2{"id":"3534aceb-b0d2-4440-a091-a05ccb52675d","pid":"","text":"<p>1</p>\n","orig":"1","user":{"name":"test","id":"anonymous_2ae43373e095b2e1e73e105eccfd96cafe1731e4","picture":"https://remark42.zeabur.app/api/v1/avatar/f4bc9500905b86c5d344bdeb04e8adec1855be05.image","ip":"89be46369fd738c3542417540bfcc2efc7986657","admin":false,"site_id":"vinny987"},"locator":{"site":"vinny987","url":"https://remark42.zeabur.app/web/"},"score":0,"vote":0,"time":"2024-12-13T14:04:02.271226721-06:00","title":"Demo | Remark42"}3{"id":"74630e7d-b9a2-4a07-b472-3cc25f5e7d7f","pid":"","text":"<p>3</p>\n","orig":"3","user":{"name":"test","id":"anonymous_2ae43373e095b2e1e73e105eccfd96cafe1731e4","picture":"https://remark42.zeabur.app/api/v1/avatar/f4bc9500905b86c5d344bdeb04e8adec1855be05.image","ip":"89be46369fd738c3542417540bfcc2efc7986657","admin":false,"site_id":"vinny987"},"locator":{"site":"vinny987","url":"https://remark42.zeabur.app/web/"},"score":0,"vote":0,"time":"2024-12-13T14:04:11.908937255-06:00","title":"Demo | Remark42"}還原可以使用以下指令(會覆蓋既有留言):
1restore -f {backup-filename.gz} -s {your site ID}如果想要匯入備份的留言,但又不想覆蓋既有留言,可以使用下列指令進行合併後還原:
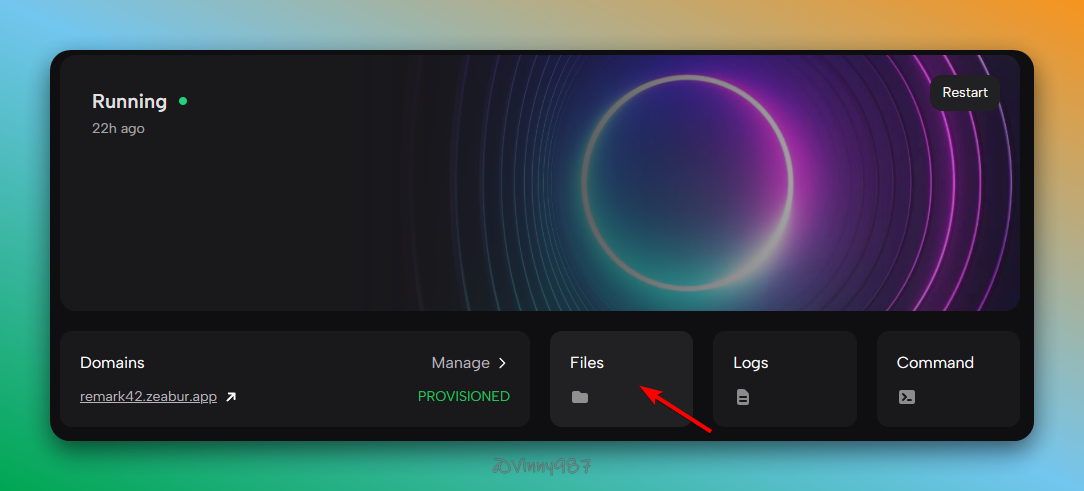
1cat backup.json | grep -v '{"version":1' >> combined.json2restore -f combined.json -s {your site ID}在 zeabur 備份 & 還原 remark42
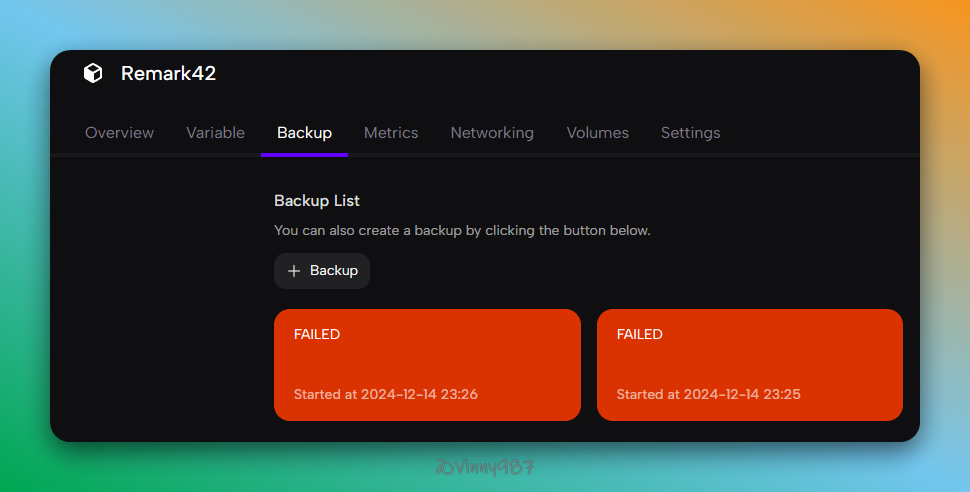
目前 zeabur 的 backup 分頁,只支援部分資料庫服務可以在服務啟動時,排程自動備份。雖然似乎有支援 Suspend 服務備份,但我嘗試幾次都顯示失敗。
目前想到的做法是,可以在映像檔中,加入固定時間執行 rsync 指令,將備份檔同步到 File server 或 Storage Service (如 AWS S3)。
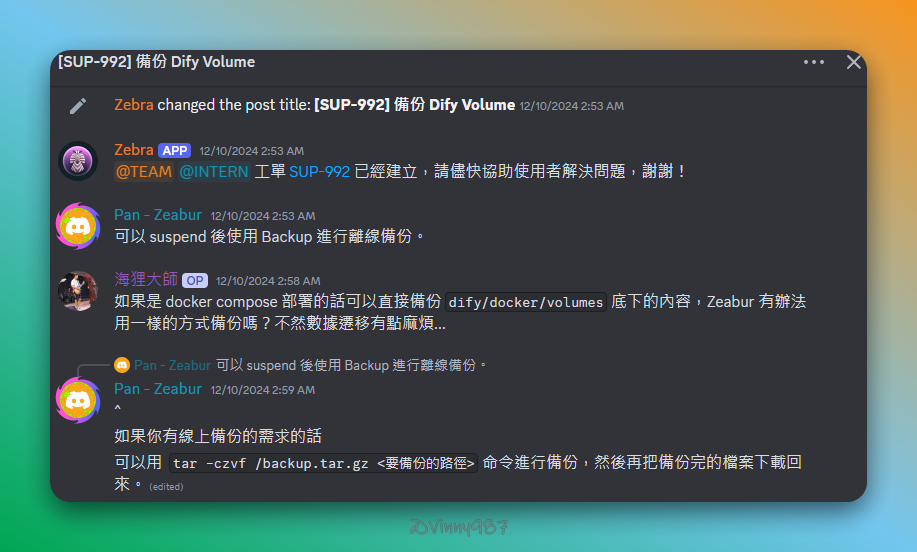
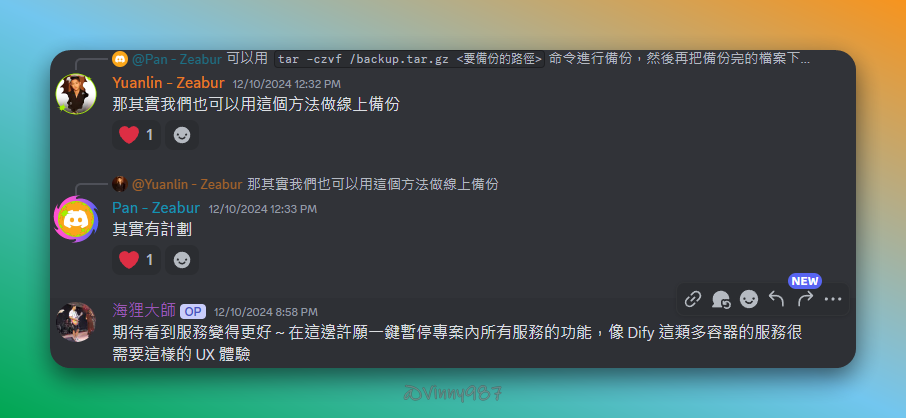
順帶一提,官方 Discord 討論串,工程師有提到,會將 Volume 的備份特性排入時程,或許在不久的將來就可以一鍵自動備份了。